之前开发我这个网站在选用富文本编辑器时选择了django-ckeditor这个,主要发现直接在django里面设置即可使用,感觉很方便,后面有个要实现对发表了的博客文章修改功能,发现单纯使用django-ckeditor就很难实现了,django-ckeditor源码基本来自于ckeditor,因此是否可以从ckeditor编辑器下手来辅助django-ckeditor实现文章修改的功能,结果是当然可以。话不多说,开干,进入ckeditor官网,下载ckeditor,官网地址点击此处https://ckeditor.com/cke4/builder 。选择下载
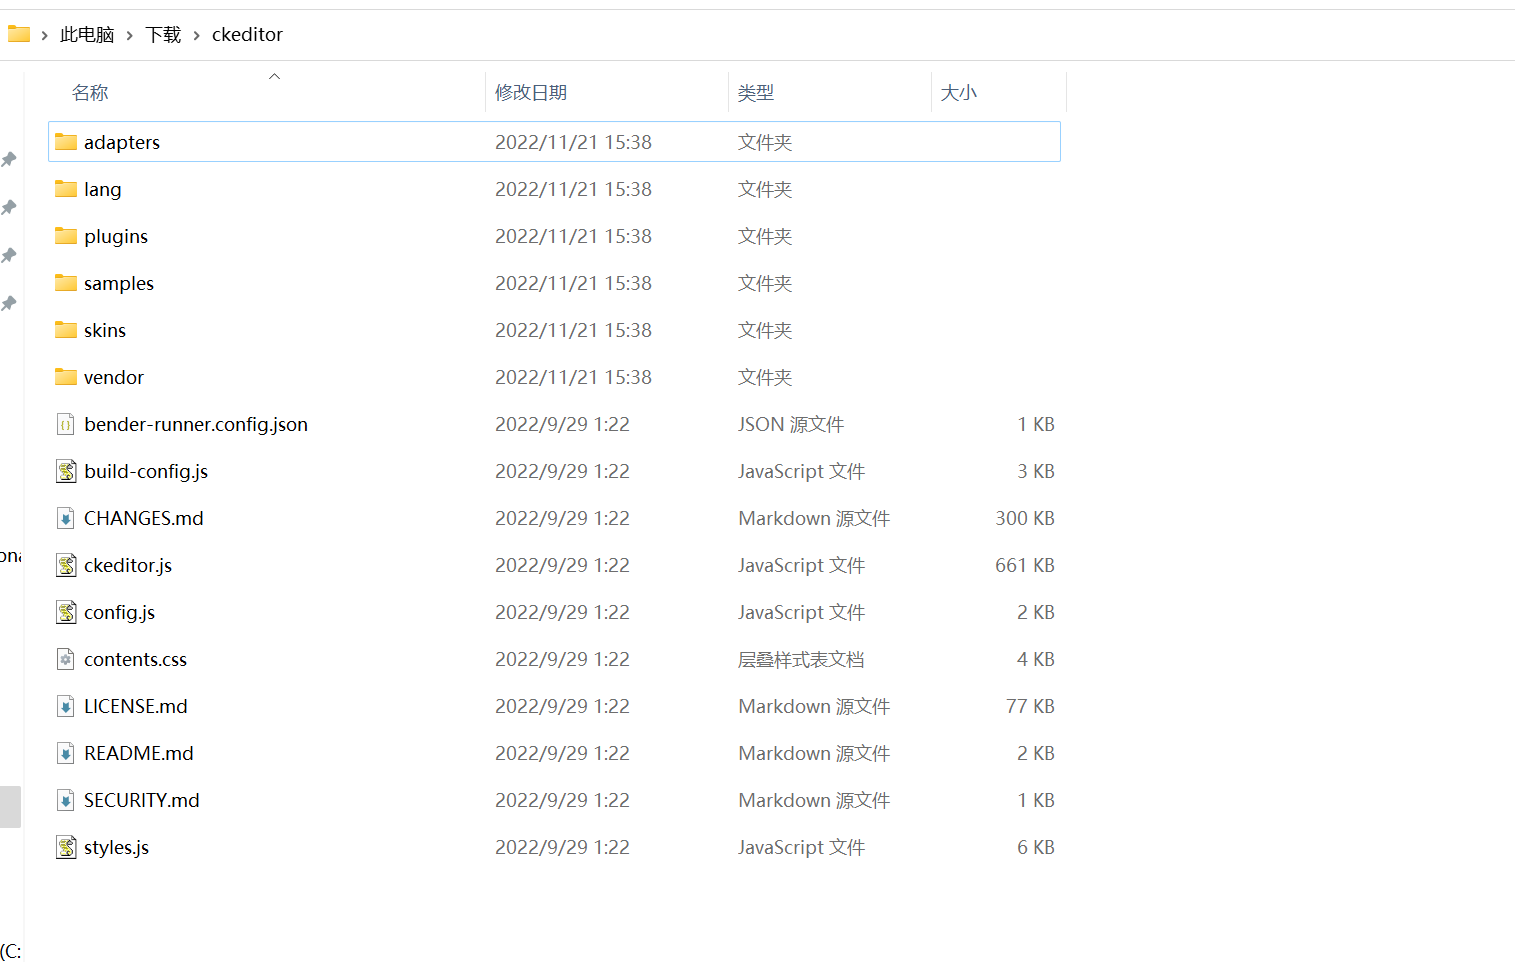
里面的文件如图所示
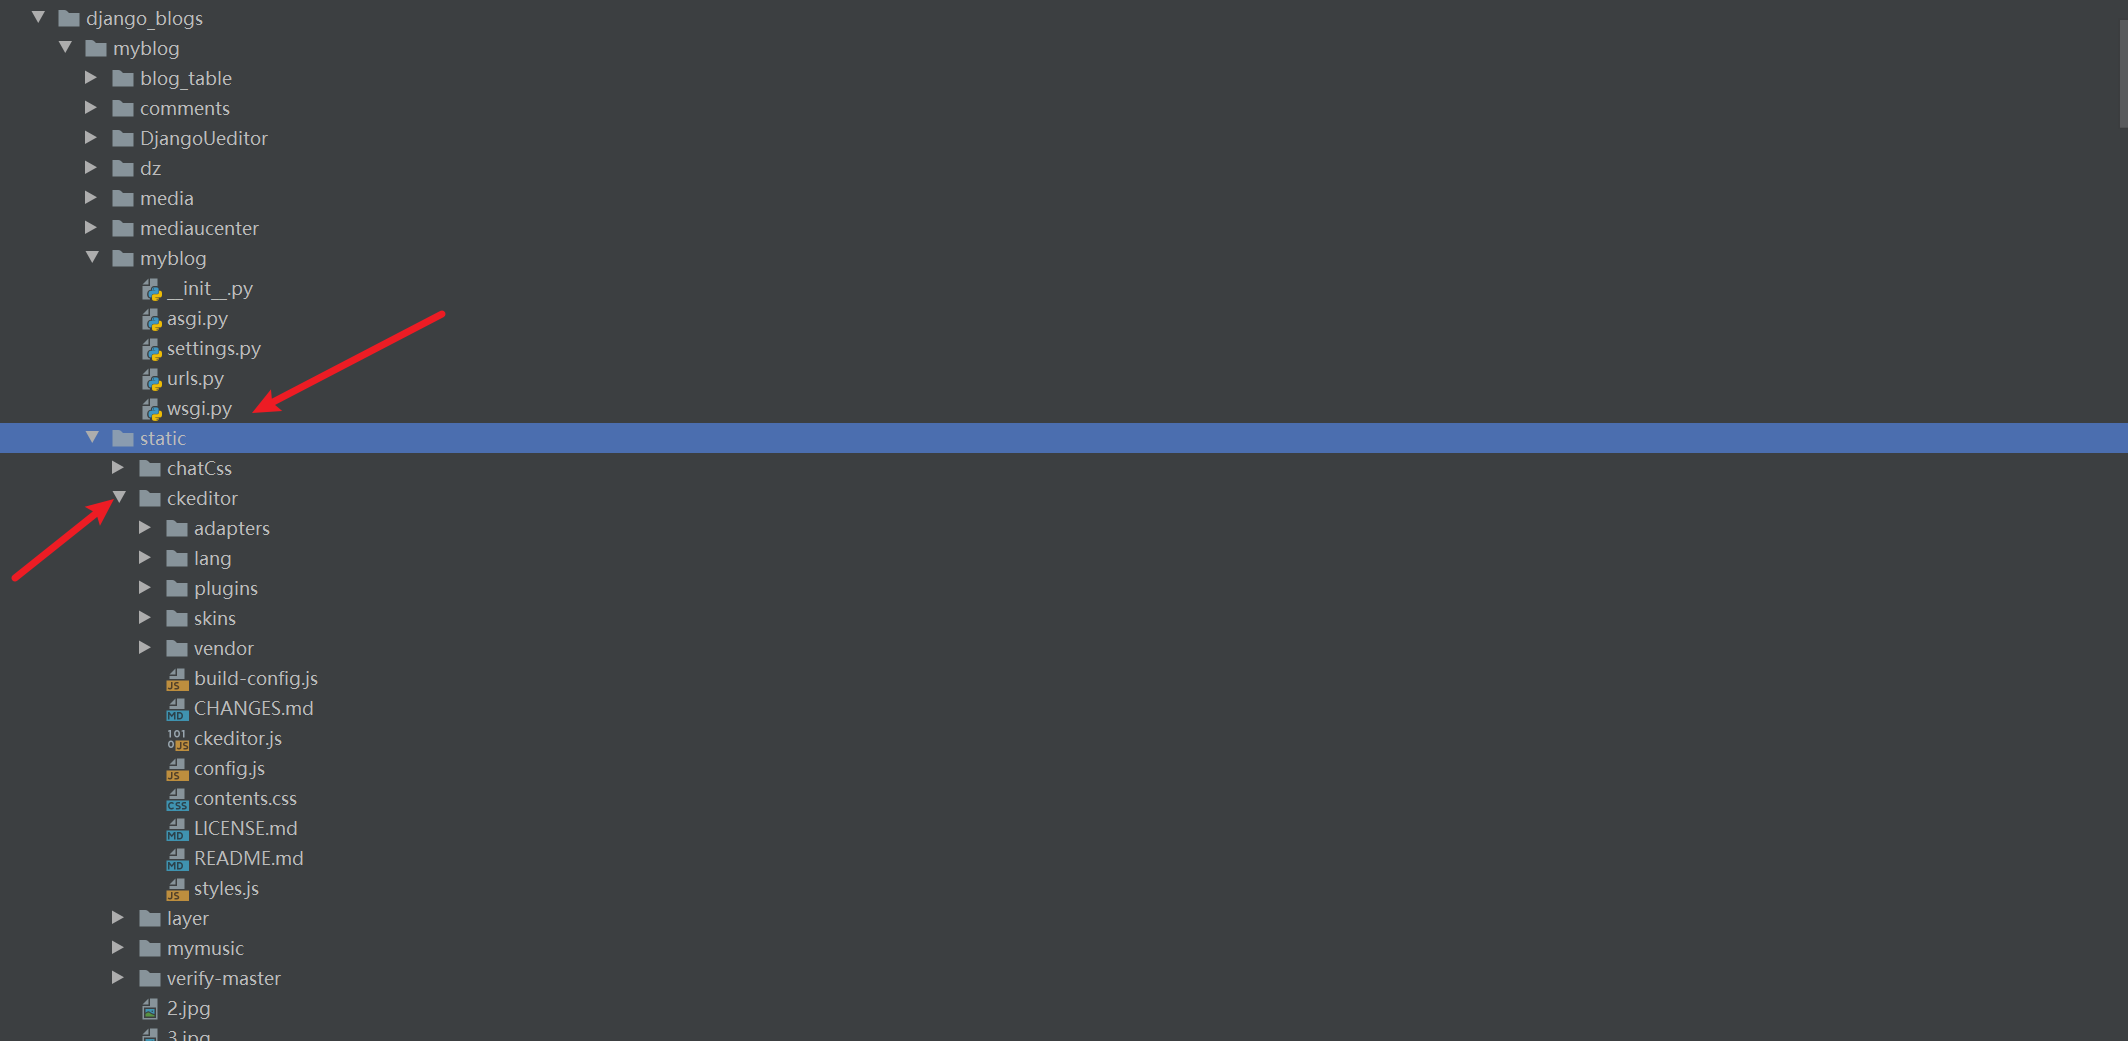
作为一个静态文件,django中习惯放在static文件夹中,如图所示
我们前端如何引用呢,这里以我网站为例,我的网站的修改文章界面是update.html,如图所示 作为文章修改功能,必须把之前的文章内容传过来,关键代码如下所示
<div class="form-group" style="margin-top: 50px;margin-left: 20%">
            <textarea cols="80" id="bj" name="content"  >


                {{content|safe}}
            </textarea>
        </div>
content是后端传来要修改的内容,那么我们如何在update页面实现修改呢,肯定要用到富文本编辑器,这里用textarea和j实现了,看js代码
 <script>
    CKEDITOR.replace('bj', {
        'mathJaxLib' : '//cdn.mathjax.org/mathjax/2.6-latest/MathJax.js?config=TeX-AMS_HTML',
       'extraPlugins': ['codesnippet','prism','uploadimage','widget','lineutils','lineheight','mathjax'],codeSnippet_theme: 'zenburn',
    'toolbar_Custom': [
            ['Bold', 'Italic', 'Underline', 'Format', 'RemoveFormat'],
            ['NumberedList', 'BulletedList','Save','Preview','TextColor','document','Mathjax'],
            ['Blockquote', 'CodeSnippet','Smiley','FontSize','Font','BGColor','ImageButton'],
            ['Image', 'Link', 'Unlink','JustifyLeft','JustifyCenter','JustifyRight'],
            ['Maximize','Form','SelectAll','PasteText','Cut','Copy','Paste','editing','lineheight',]
        ],
        'language':'zh-cn',
        'disallowedContent':'img{width,height};img[width,height]',
        'width':'80%',
        'height':'auto',
        'image_previewText':' ',
        'tabSpaces': 4,
        'toolbar': 'Custom',
        'smiley_columns':10,
        filebrowserUploadUrl: '/uploadImage/',
        'smiley_images':['a_1.png', 'a_2.png', 'a_3.png', 'a_4.png', 'a_5.png', 'a_6.png', 'a_7.png', 'a_8.png',
	'a_9.png', 'a_10.png', 'a_11.png', 'a_12.png', 'a_13.png', 'a_14.png', 'a_15.png', 'a_16.png', 'a_17.png', 'a_18.png',
	'a_19.png', 'a_20.png', 'a_21.png', 'a_22.png', 'a_23.png', 'a_24.png', 'a_25.png', 'a_26.png', 'a_27.png', 'a_28.png',
	'a_29.png', 'a_30.png', 'a_31.png', 'a_32.png', 'a_33.png', 'a_34.png', 'a_35.png', 'a_36.png', 'a_37.png', 'a_38.png',
	'a_39.png', 'a_40.png', 'a_41.png', 'a_42.png', 'a_43.png', 'a_44.png', 'a_45.png', 'a_46.png','a_47.png','a_48.png',
    'a_49.png','a_50.png','a_51.png','a_52.png','a_53.png','a_54.png','a_55.png','a_56.png','a_57.png','a_58.png','a_59.png',
    'a_60.png','a_61.png','a_62.png','a_63.png','a_64.png','a_65.png','a_66.png','a_67.png','a_68.png','a_69.png','a_70.png',]
    });
  </script>
为了使得ckeditor文章修改界面和写博客的django-ckeditor界面一致,尽可能将属性和settings.py一一对应,这是我settings.py中django-ckeditor写文章的样式代码
CKEDITOR_CONFIGS = {
    # 配置名是default时,django-ckeditor默认使用这个配置
    'default': {

        # 使用简体中文
        'language':'zh-cn',
        'mathJaxLib' : '//cdn.mathjax.org/mathjax/2.6-latest/MathJax.js?config=TeX-AMS_HTML',
        'disallowedContent':'img{width,height};img[width,height]',
        # 编辑器的宽高请根据你的页面自行设置
        'width':'100%',
        'height':'auto',
        'image_previewText':' ',#替换图片区域那种搞不懂的字符串
        'tabSpaces': 4,
        'toolbar': 'Custom',
        'smiley_columns':10,
        'smiley_images':['a_1.png', 'a_2.png', 'a_3.png', 'a_4.png', 'a_5.png', 'a_6.png', 'a_7.png', 'a_8.png',
	'a_9.png', 'a_10.png', 'a_11.png', 'a_12.png', 'a_13.png', 'a_14.png', 'a_15.png', 'a_16.png', 'a_17.png', 'a_18.png',
	'a_19.png', 'a_20.png', 'a_21.png', 'a_22.png', 'a_23.png', 'a_24.png', 'a_25.png', 'a_26.png', 'a_27.png', 'a_28.png',
	'a_29.png', 'a_30.png', 'a_31.png', 'a_32.png', 'a_33.png', 'a_34.png', 'a_35.png', 'a_36.png', 'a_37.png', 'a_38.png',
	'a_39.png', 'a_40.png', 'a_41.png', 'a_42.png', 'a_43.png', 'a_44.png', 'a_45.png', 'a_46.png','a_47.png','a_48.png',
    'a_49.png','a_50.png','a_51.png','a_52.png','a_53.png','a_54.png','a_55.png','a_56.png','a_57.png','a_58.png','a_59.png',
    'a_60.png','a_61.png','a_62.png','a_63.png','a_64.png','a_65.png','a_66.png','a_67.png','a_68.png','a_69.png','a_70.png',],
        # 添加按钮在这里
        'toolbar_Custom': [
            ['Bold', 'Italic', 'Underline', 'Format', 'RemoveFormat'],
            ['NumberedList', 'BulletedList','Save','Preview','TextColor','document','Mathjax'],
            ['Blockquote', 'CodeSnippet','Smiley','FontSize','Font','BGColor','ImageButton'],
            ['Image', 'Link', 'Unlink','JustifyLeft','JustifyCenter','JustifyRight'],
            ['Maximize','Form','SelectAll','PasteText','Cut','Copy','Paste','editing','lineheight']
        ],
        # 插件
        'extraPlugins': ','.join(['codesnippet','prism','uploadimage','widget','lineutils','lineheight','mathjax']),

    }
}
保持一致,这样ckeditor文章修改界面可以和django-ckeditor一样了,ckeditor实现了修改还得有文件上传的功能,这个不像django-ckeditor文件上传功能一样有现成的,ckeditor上传我们得专门写个视图函数处理图片上传。update.html中上传图片的路径是filebrowserUploadUrl: '/uploadImage/',因此我们必须对uploadImage路由写个视图函数,视图函数代码如下
class UPloadImage(View):
    def post(self,request):

        username = self.request.user.username
        uploadfile = request.FILES['upload']
        #旧版的有参数
        ck_func_num = request.GET.get('CKEditorFuncNum')
        # now_time_ = time.localtime(time.time())
        # year,month,day = time.strftime("%Y-%m-%d", now_time_).split('-')
        # if not os.path.exists(settings.MEDIA_ROOT+'/ucenter/{}/{}/{}/{}'.format(username,year,month,day)):
        #     os.makedirs(settings.MEDIA_ROOT+'/ucenter/{}/{}/{}/{}'.format(username,year,month,day))
        # flag = int(time.time()*1000)
        # print(777777777777777777777777)
        # img_path = settings.MEDIA_ROOT+'/ucenter/{}/{}/{}/{}/{}'.format(username,year,month,day,str(flag)+'.jpg')
        # url_ = settings.MEDIA_URL+'ucenter/{}/{}/{}/{}/{}'.format(username,year,month,day,str(flag)+'.jpg')
        # with open(img_path,'wb') as f1:
        #     f1.write(uploadfile.read())
        print('1818181818181818')
        name = uploadfile.name
        up = upyun.UpYun('服务名称', '操作员账号', '操作员密码', timeout=30,
                         endpoint=upyun.ED_AUTO)
        new_name = "blogImg/{}.{}".format(str(uuid.uuid1()).replace('-', ''),
                                          name.split(".").pop())
        up.put(new_name, uploadfile.file, checksum=True)
        base_url = 'https://img.codingchangeworld.com/{}'.format(new_name)
        res = """<script type="text/javascript">
                     window.parent.CKEDITOR.tools.callFunction(%s, '%s');
                     </script>""" % (ck_func_num, base_url,)

        #判断是旧版,则直接返回js
        if ck_func_num:
            return HttpResponse(res)
        #新版则返回json
        else:
            retdata = {'url': base_url, 'uploaded': '1',
                       'fileName': new_name}
            return JsonResponse(retdata)
这里文章修改上传图片功能为了和写文章上传图片功能一致,都使用了又拍云实现上传图片的云存储,由于ckeditor可能有很多版本,对于新版的必须返回json格式,老版的必须返回js,这个代码很好理解了,因此总的来说这里没有用django-ckeditor来实现文章修改功能,而用ckeditor来代替django-ckeditor来实现,如果有的伙伴用django-ckeditor实现了麻烦告知我一声,万分感谢!
如果上述代码帮助您很多,可以打赏下以减少服务器的开支吗,万分感谢!


 赣公网安备 36092402000079号
点击此处登录后即可评论